Friday, December 19, 2014

Change Your Website Mouse Cursor

;
Hi guys, It's me again and today, I'm going to show how to change your blogger mouse cursor. The
default cursor of blogger looks unattractive as it is the default cursor of your OS. but, after you customize the blogger cursor, it looks amazing.
Now, let's add it in our blog
First of all, you must get a cursor. I recommend you to go to this site to get cursor. Now, let's add it in our blog:

  • Go To Blogger Dashboard
  • Click On Template
  • Select Edit HTML
  • Search For This Code: ]]></b:skin>
  • Paste The Following Codes There
body, a, a:hover ,a:visited { cursor: url(Cursor Url), progress; }

  • Change Cursor URL with the selected cursor URL
  • Save The Template
  • Check Your Blog
Now,your blog has a new cursor. If you have any problems, feel free to ask me.
Happy Blogging!!!

Saturday, December 13, 2014

OS X Styled Sharing Widget For Blogger

;
We have seen different social media widgets in most of the blogs. A blog without social media is an
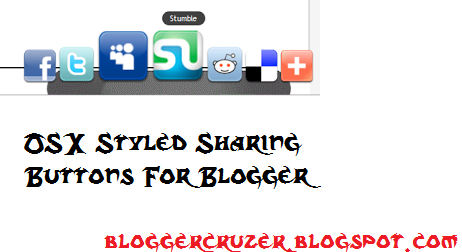
incomplete blog. For making a blog complete and more advanced, social media is highly required. So, in this post, we will be discussing on adding social media widget for blogger. In this post, we will be discussing on Adding OS X Styled Sharing Widget For blogger. Have you ever used MAC OS X. If you have used, you may find a Desk Like Thing where all apps are placed and when we hover on it, it starts to move. The Widget is same like that.
For Live Demo, you can click below Link:
LIVE DEMO
Or you can watch the picture on the right side.
Now Let's Add This. Follow My Steps To Add This:

  • Go To Blogger Dashboard
  • Click On Layout
  • Click On Add A Gadget
  • Select HTML/JAVASCRIPT
  • Copy and paste the given codes there
<!-- bloggercruzer.blogspot.com !-->
<style type="text/css">
  #sharedock { position: fixed; bottom: 0; left: 0; width: 100%; height: 90px; z-index: 999; }
  #dock { position: relative; bottom: 0; font: 13px "Trebuchet MS", Verdana, Helvetica, sans-serif; }
  .dock-container { position: relative; background:url(https://blogger.googleusercontent.com/img/b/R29vZ2xl/AVvXsEisEnfuNJjbtZHGqz5Fm7VvAurkb29IGwG5vhUY4_Gwm-BSpGgnvIa494-aZfcfAfi_E_zXPP1IHNMkcmXjmgSjzhzXIVg6bBeHt9BqgT_f3uAL6r42mYC8QDVHzuTA-lBjSx72HaZKMG0z/s1600/bloggertrix1.gif) no-repeat bottom center; height: 50px; padding: 20px 0 20px 0; }
  .dock-container .custom_images a { display: block;  position: absolute; bottom: 0; text-align: center; text-decoration: none; color: #333; cursor: pointer; }
  .dock-container .custom_images span { background: rgba(0,0,0,.75); display: none; padding: 2px 8px; margin-left: 17px; font-size: 11px; color: #fff; -moz-border-radius: 10px; -webkit-border-radius: 10px; }
  .dock-container .custom_images img { border: 0; margin: 5px 0px 10px 0px; width: 100%; }
  </style>

<div id="sharedock">
  <div id="dock">
  <div class="dock-container">

<div class="addthis_toolbox"> 

 <div class="custom_images">

 <a class="addthis_button_facebook"><span>Facebook</span><img src="http://addthis.com/cms-content/images/gallery/aquaticus_facebook.png" alt="Share to Facebook" /></a>
  <a class="addthis_button_twitter"><span>Twitter</span><img src="http://addthis.com/cms-content/images/gallery/aquaticus_twitter.png" alt="Share to Twitter" /></a>
<a class="addthis_button_myspace"><span>MySpace</span><img src="http://addthis.com/cms-content/images/gallery/aquaticus_myspace.png" alt="Share to MySpace" /></a>
<a class="addthis_button_stumbleupon"><span>Stumble</span><img src="http://addthis.com/cms-content/images/gallery/aquaticus_stumbleupon.png" alt="Stumble It" /></a>
<a class="addthis_button_reddit"><span>Reddit</span><img src="http://addthis.com/cms-content/images/gallery/aquaticus_reddit.png" alt="Share to Reddit" /></a>
<a class="addthis_button_delicious"><span>Delicious</span><img src="http://addthis.com/cms-content/images/gallery/aquaticus_delicious.png" alt="Share to Delicious" /></a>
  <a class="addthis_button_more"><span>More...</span><img src="http://addthis.com/cms-content/images/gallery/addthis_64.png" alt="More..." /></a>
  </div>
  </div> 
  </div>
  </div>
  </div>

  <script type="text/javascript" src="http://s7.addthis.com/js/250/addthis_widget.js"></script>
  <script type="text/javascript" src="http://ajax.googleapis.com/ajax/libs/jquery/1.3.2/jquery.min.js"></script>
  <script type="text/javascript" src="http://addthis.com//cms-content/images/gallery/fisheye-iutil.min.js"></script>
  <script type="text/javascript">
  $(function () { 
  // Dock initialize
  $('#dock').Fisheye(
  {
  maxWidth: 30,
  items: 'a',
  itemsText: 'span',
  container: '.dock-container',
  itemWidth: 50,
  proximity: 60,
  alignment : 'left',
  valign: 'bottom',
  halign : 'center'
  }
  );
  });
  </script>
  • Save The Gadget
  • Save The Template
  • Check Your Blog
All Done. If you have any problems regarding this, Comment and I Shall be Helping You. Happy Blogging

How To Add A Search Box With Speak Now Option For Your Blogger

;
Hi Guys, Today I'm Gonna Show You How To add Search Box For blogger Which Also Consists Of Speak Now Option. The Speak Now Option Looks like Google Now In Androids. It Helps visitors to Speak and search.
You can view the LIVE Demo By Clicking On this Site;
LIVE DEMO
Or You Can Watch The Picture at the right side.
Now, Follow My Steps To Add This;

  • Go To Blogger Dashboard
  • Click On Layout
  • Select HTML/JAVASCRIPT
  • Paste The Codes There

<!-- bloggercruzer.blogspot.com !-->
<form action="http://bloggercruzer.blogspot.com/search/" id="searchform" method="get"> <input id="s" name="q" placeholder="Search" type="text" value x-webkit-speech="true" /> </form>
Change bloggercruzer.blogspot.com with your blog's Name

  • Save The Template
  • View Your blog
It's Done. If you catch any problems, Comment and I shall Help You
Happy Blogging!!!

Friday, December 12, 2014

Customize Blogger Subheadings, Minor Headings

;
Hello Guys, you have seen different websites where you can see a subheadings which actually looks
different to the headings than other blogs. Most of us want such headings, subheadings in our blog. 
So, in this post, we will be discussing on Changing our blogger Subheadings, Minor headings
If you want to Look Live Demo, Click On Live Demo Below:
LIVE DEMO

Now, Let's add it in our blog. Follow my Simple steps to get it in your blog;

  • Go To Blogger Dashboard
  • Select Your Blog and Click On Template
  • Select Edit HTML
  • Now, Search For This Code ]]></b:skin> using CTRL+F 
  • Paste The Code Just Above It.
Code For Blogger Sub-Headings

/**Subheading by www.bloggercruzer.blogspot.com**/
.post h3 {
background: url("https://blogger.googleusercontent.com/img/b/R29vZ2xl/AVvXsEigEj8AULjRVaIE1T6WyPmnTViUYR9aV1Y4oeL_looiD8ZYAVm2fDr0V9hJ73fiHsQb3T7XqGGGoNZZI1hcO72ICY1VgXngtXILiAOuVt9YvD4uhK5swFXzR2xgFa1Enf5_uQFqji6W6sQ/s400/BS%252BPostTitle%252B1.png") no-repeat scroll 4px center transparent;
font-size: 20px;
font-family: "Trebuchet MS",sans-serif;
text-align: left;
font-weight: bold;
width: 570px;
padding: 3px 10px 3px 30px;
color: rgb(165, 165, 3);
border: 3px solid rgb(200, 200, 0);
text-shadow: 0px 1px 0px rgb(204, 204, 204);
border-radius: 60px 60px 60px 60px;
box-shadow: 0px 1px 3px rgb(198, 198, 198), 1px 1px 0px rgba(255, 255, 255, 0.4) inset;
margin: 15px 3px;
text-transform: uppercase;
line-height: 1;
}
And This Code For Blogger Minor Headings

/**Minor Heading by www.bloggercruzer.blogspot.com**/
.post h4 {
background: url("https://blogger.googleusercontent.com/img/b/R29vZ2xl/AVvXsEhXEvMzcuAjtCPyjLujWBLY_C5vGdgz3zlvUODs1VylpM7myRi8KPYnOAdGpjI9VxzU5eJNX4NnfQv4X4LEIeQTiwusL-rx3SxiTy1fNpE1ekXjQkIEKoKPWCHaHNGtybkGJljXzXYy798/s400/BS%252BPostTitle%252B2.png") no-repeat scroll 5px center transparent;
clear: both;
color: rgb(102, 45, 45);
font-family: "Trebuchet MS",sans-serif;
font-size: 20px;
font-weight: bold;
line-height: 1;
margin: 10px 5px;
padding: 6px 10px 2px 40px;
text-transform: none;
text-shadow: 0px 1px 0px rgb(204, 204, 204);
}

  • Now, Save The Template
  • Enjoy!!
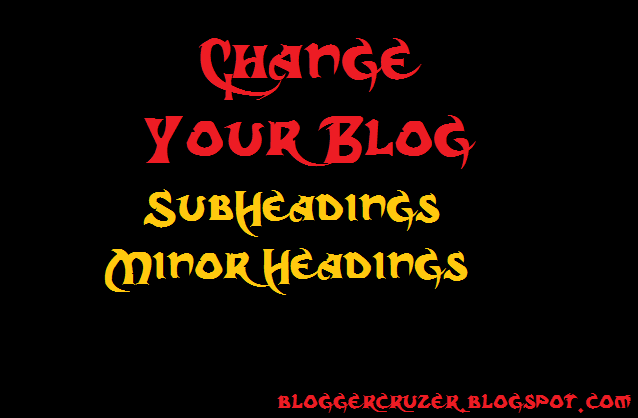
The New Sub-Heading Of your blog must look like this;

THIS IS SUB HEADING 

And The Minor Heading Must Look Like This;

This Is Minor Heading

All Done. If You have any problems, feel free to ask Us.
Happy Blogging!!!!

Saturday, November 29, 2014

Change Scroll Bar Of Blogger

;
Hi guys, Today i'm bringing the best tutorial. In this tutorial, we will be discussing on how to change our blogger scroll bar. As we know that the default scroll bar of blogger looks ugly and unattractive. So, we will change the unattractive scrollbar to attractive and advanced scrollbar.  You can see the live demo in our blog. We have used the same scrollbar. So, let's add it in our blog.
Follow My Steps:

  • Go To Blogger Dashboard
  • Click On Template
  • Click On Edit HTML
  • Search The Code ]]></b:skin> using CTRL + F
  • Paste The Following Codes Just Above It

<!-- bloggercruzer.blogspot.com !-->
::-webkit-scrollbar {
width: 8px; height:8px;
}
::-webkit-scrollbar-track {
-webkit-box-shadow: inset 0 0 4px rgba(0,0,0,0.3);
background:#fff;
}
::-webkit-scrollbar-thumb {
background: rgba(186,35,35,0.8);
-webkit-box-shadow: inset 0 0 6px rgba(0,0,0,0.5);
}
::-webkit-scrollbar-thumb:window-inactive {
background: rgba(186,35,35,0.4);

  • Save Your Template
  • View Your Blog
You can find the amazing scrollbar in your blog. If you have any problems, comment and I shall help you. Happy Blogging!!!

Thursday, November 27, 2014

Change Your Comment Style In Blogger

;
As We Know That comments are the base of the blog. We Can find our solutions, ask queries, talk with admin and do many things with comment. But, as we know that the default comment style provided by blogger is not nice. It Looks ugly.
So, today i'm posting you how to Change comment style in your blogger blog. You Can see the Live demo In our blog or watch the picture below. The Comment box looks like this;
Now, let's add this in Our Blog. Follow My Simple steps to add it in our blog:

  • Log in to your blogger account
  • Select Template and click Edit HTML (Click on Proceed)
  • Find ]]></b:skin> [USING CTRL+F] Or use Alternate Way Of Pasting CSS
  • Copy the Code below

comments .comment-block {
background: url("https://blogger.googleusercontent.com/img/b/R29vZ2xl/AVvXsEic6kj_Wy0YvG7jLSfj2oruahmTL4W6B1tPL1RH8pgbpK2Jd786454rEZLQI0jFrOpzT2O2RYtDi7dLeGKjEAePi4AMh1yQLhglqD4MuRCJq7GMArFZ9P03t-uh5me04e_bKKB1umQxx2g/s1600/bg.png") repeat scroll 0 0 transparent;
border: 4px solid #EAEAEA;
border-radius: 3px 3px 3px 3px;
box-shadow: 3px 3px 0 #D6D6D6;
margin-left: 48px;
padding: 3px 10px;
position: relative;
}
#comments .avatar-image-container img {
border: 2px solid #FFFFFF !important;
border-radius: 50px 50px 50px 50px;
height: 57px;
max-width: 57px;
}
.comments .avatar-image-container {
border: 2px solid #FFFFFF;
border-radius: 34px 34px 34px 34px;
box-shadow: 1px 1px 3px #ABABAB;
float: left;
margin-left: -40px;
max-height: 60px !important;
overflow: hidden;
width: 60px !important;
}
.comment-header {
border-bottom: 2px solid #F1F1F1;
}
.comment-block:hover > .comment-header {
-moz-transition: border-color 0.5s ease 0s;
border-bottom: 2px solid #000000;
}
.comments .comment .comment-actions a {
background: -moz-linear-gradient(center top , #EEEEEE 0%, #CCCCCC 100%) repeat scroll 0 0 transparent;
border: 2px solid #E0E0E0;
border-radius: 3px 3px 3px 3px;
color: #000000;
font: bold 12px arial;
margin-right: 14px;
padding: 4px 11px !important;
text-decoration: none !important;
text-shadow: 1px 1px 0 #FFFFFF;
}

  • After Pasting It, Save the template
Now Your blog's Comment Style Looks More Amazing and attractive than before. This Is an easy tutorial. If you have any problems regarding this, comment and I shall be helping you.
Happy Blogging!!!

Add CSS Codes in Your Blogger Blog Easily

;
In my previous post, I had mentioned about CSS in Detail. So, i'm not gonna describe it anymore. In this post, we will be discussing on adding CSS codes In your blogger blog. Mainly, there are two steps of adding CSS codes in your blog. One is easy method and another is hard method. I will teach you both methods to add CSS codes. So, Follow my steps;
Easy Method:

  • Go To Blogger Dashboard
  • Click On Template
  • Click On Customize
  • Then Click On Advanced And Add CSS as shown in the picture below;

  •  Place the CSS codes in the Text area.
  • Save by click on Apply to Blog
  • Enjoy
Hard Method:
  • Go To Blogger Dashboard
  • Click On Template
  • Click On Edit HTML
  • Then Search For ]]></b:skin>
  • Paste The CSS Codes Just Above ]]></b:skin>
  • Save The Template
Note: If this method isn't properly used, it can make your template crash. So, be careful while doing it.
These Are The Steps for Adding CSS Codes in your blog. I Recommend you to use easy method to add CSS because, it won't harm your template in any ways. If you have any problems regarding this, comment and I shall help You.
Happy Blogging!!!

Blogger Cruzer

Blogger Cruzer

Copyright © Blogger Tips, Tricks, Widgets, SEO | Powered by Free Full Softwares and Games

Design by Nischal Khanal Blogger Cruzer

Auto Scroll Stop Scroll