Saturday, December 13, 2014

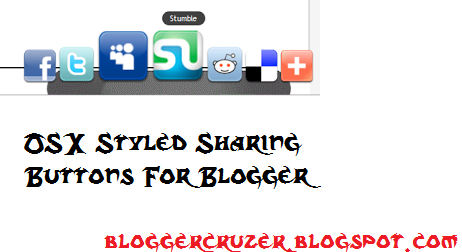
OS X Styled Sharing Widget For Blogger

;
We have seen different social media widgets in most of the blogs. A blog without social media is an
incomplete blog. For making a blog complete and more advanced, social media is highly required. So, in this post, we will be discussing on adding social media widget for blogger. In this post, we will be discussing on Adding OS X Styled Sharing Widget For blogger. Have you ever used MAC OS X. If you have used, you may find a Desk Like Thing where all apps are placed and when we hover on it, it starts to move. The Widget is same like that.
For Live Demo, you can click below Link:
LIVE DEMO
Or you can watch the picture on the right side.
Now Let's Add This. Follow My Steps To Add This:

  • Go To Blogger Dashboard
  • Click On Layout
  • Click On Add A Gadget
  • Select HTML/JAVASCRIPT
  • Copy and paste the given codes there
<!-- bloggercruzer.blogspot.com !-->
<style type="text/css">
  #sharedock { position: fixed; bottom: 0; left: 0; width: 100%; height: 90px; z-index: 999; }
  #dock { position: relative; bottom: 0; font: 13px "Trebuchet MS", Verdana, Helvetica, sans-serif; }
  .dock-container { position: relative; background:url(https://blogger.googleusercontent.com/img/b/R29vZ2xl/AVvXsEisEnfuNJjbtZHGqz5Fm7VvAurkb29IGwG5vhUY4_Gwm-BSpGgnvIa494-aZfcfAfi_E_zXPP1IHNMkcmXjmgSjzhzXIVg6bBeHt9BqgT_f3uAL6r42mYC8QDVHzuTA-lBjSx72HaZKMG0z/s1600/bloggertrix1.gif) no-repeat bottom center; height: 50px; padding: 20px 0 20px 0; }
  .dock-container .custom_images a { display: block;  position: absolute; bottom: 0; text-align: center; text-decoration: none; color: #333; cursor: pointer; }
  .dock-container .custom_images span { background: rgba(0,0,0,.75); display: none; padding: 2px 8px; margin-left: 17px; font-size: 11px; color: #fff; -moz-border-radius: 10px; -webkit-border-radius: 10px; }
  .dock-container .custom_images img { border: 0; margin: 5px 0px 10px 0px; width: 100%; }
  </style>

<div id="sharedock">
  <div id="dock">
  <div class="dock-container">

<div class="addthis_toolbox"> 

 <div class="custom_images">

 <a class="addthis_button_facebook"><span>Facebook</span><img src="http://addthis.com/cms-content/images/gallery/aquaticus_facebook.png" alt="Share to Facebook" /></a>
  <a class="addthis_button_twitter"><span>Twitter</span><img src="http://addthis.com/cms-content/images/gallery/aquaticus_twitter.png" alt="Share to Twitter" /></a>
<a class="addthis_button_myspace"><span>MySpace</span><img src="http://addthis.com/cms-content/images/gallery/aquaticus_myspace.png" alt="Share to MySpace" /></a>
<a class="addthis_button_stumbleupon"><span>Stumble</span><img src="http://addthis.com/cms-content/images/gallery/aquaticus_stumbleupon.png" alt="Stumble It" /></a>
<a class="addthis_button_reddit"><span>Reddit</span><img src="http://addthis.com/cms-content/images/gallery/aquaticus_reddit.png" alt="Share to Reddit" /></a>
<a class="addthis_button_delicious"><span>Delicious</span><img src="http://addthis.com/cms-content/images/gallery/aquaticus_delicious.png" alt="Share to Delicious" /></a>
  <a class="addthis_button_more"><span>More...</span><img src="http://addthis.com/cms-content/images/gallery/addthis_64.png" alt="More..." /></a>
  </div>
  </div> 
  </div>
  </div>
  </div>

  <script type="text/javascript" src="http://s7.addthis.com/js/250/addthis_widget.js"></script>
  <script type="text/javascript" src="http://ajax.googleapis.com/ajax/libs/jquery/1.3.2/jquery.min.js"></script>
  <script type="text/javascript" src="http://addthis.com//cms-content/images/gallery/fisheye-iutil.min.js"></script>
  <script type="text/javascript">
  $(function () { 
  // Dock initialize
  $('#dock').Fisheye(
  {
  maxWidth: 30,
  items: 'a',
  itemsText: 'span',
  container: '.dock-container',
  itemWidth: 50,
  proximity: 60,
  alignment : 'left',
  valign: 'bottom',
  halign : 'center'
  }
  );
  });
  </script>
  • Save The Gadget
  • Save The Template
  • Check Your Blog
All Done. If you have any problems regarding this, Comment and I Shall be Helping You. Happy Blogging

Peeling Sticker Styled Social Media Widget For Blogger

;
We have seen different social media widgets in most of the blogs. A blog without social media is an incomplete blog. For making a blog complete and more advanced, social media is highly required. So, in this post, we will be discussing on adding social media widget for blogger. We will be adding Peeling sticker styled social media widget for blogger. It looks much attractive.
For Live Demo, you can click below Link:
LIVE DEMO
Or you can watch the picture on the right side.
Now Let's Add This. Follow My Steps To Add This:

  • Go To Blogger Dashboard
  • Click On Layout
  • Click On Add A Gadget
  • Select HTML/JAVASCRIPT
  • Copy and paste the given codes there
<!-- bloggercruzer.blogspot.com !-->
<style>
p#socialicons img {    -moz-transition: all 0.2s ease-in-out;    -webkit-transition: all 0.2s ease-in-out;    -o-transition: all 0.2s ease-in-out;    -ms-transition: all 0.2s ease-in-out;    transition: all 0.2s ease-in-out;} 
p#socialicons img:hover {    -moz-transform: rotate(70deg);    -webkit-transform: rotate(70deg);    -o-transform: rotate(70deg);    -ms-transform: rotate(70deg);    transform: rotate(70deg);}
p#socialicons1 img {    -moz-transition: all 0.8s ease-in-out;    -webkit-transition: all 0.8s ease-in-out;    -o-transition: all 0.8s ease-in-out;    -ms-transition: all 0.8s ease-in-out;    transition: all 0.8s ease-in-out;}
p#socialicons1 img:hover {    -moz-transform: rotate(360deg);    -webkit-transform: rotate(360deg);    -o-transform: rotate(360deg);    -ms-transform: rotate(360deg);    transform: rotate(360deg);} 
p#socialicons2 img {    -moz-transition: all 0.5s ease-in-out;    -webkit-transition: all 0.5s ease-in-out;    -o-transition: all 0.5s ease-in-out;    -ms-transition: all 0.5s ease-in-out;    transition: all 0.5s ease-in-out;} 
p#socialicons2 img:hover {    -moz-transform: rotate(-360deg);    -webkit-transform: rotate(-360deg);    -o-transform: rotate(-360deg);    -ms-transform: rotate(-360deg);    transform: rotate(-360deg);}</style>

<center><p id="socialicons">    
<a href="http://www.facebook.com/Nischalcreation" target="_blank"><img border="0" src="https://blogger.googleusercontent.com/img/b/R29vZ2xl/AVvXsEheFAj_ah9MrP15pX1O6qhj_AoH3YiTWMHeAU1svf07vwaFpl30gbDrNt1bypAKnz26n3wfermBebAtKF3Fx0xpjh27Qib8WqSxFpL76MbNx-OtV4z1A1GHzO7PN0hRr-MYzTvDheVXsK3T/s1600/bloggertrix-facebook.png" /></a>    
<a href="http://www.twitter.com/Nischalcreation" target="_blank"><img border="0" src="https://blogger.googleusercontent.com/img/b/R29vZ2xl/AVvXsEidWmYfZJ82JT8iiDB0J6EWXgzDSK0IWIohptuQrPUSo5jFfMtdNzy4yqvcccrNsCPrrZyC8J-i8GPIj8fRO3WucAiq14naZcySwYqWca_C7_9Xhb_Ws7J_9btxGKu0PwbqzVRGkuPjCANC/s1600/bloggertrix-twitter.png" /></a>    
<a href="https://www.stumbleupon.com/Username" target="_blank"><img border="0" src="https://blogger.googleusercontent.com/img/b/R29vZ2xl/AVvXsEhNu1fEdl1OG4ioskZN0Q3qtuLZXR7_EFV7NApCIvB4vLtP7XvHmn3wOeJ-C-tVqzD3aLsC_E3HYx8NkrPTgn-L5lgfxKj9SKUJhHLGw6SPzbgNoSAy3qsKnUhP9IfOQa6pH7g-E4fpub65/s1600/bloggertrix-stumbleupon.png" /></a>    
<a href="http://feeds.feedburner.com/Bloggercruzer/" target="_blank"><img border="0" src="https://blogger.googleusercontent.com/img/b/R29vZ2xl/AVvXsEgqzS7yuDpBm-B8kQw1XL8DVZ-RM4z9tSbTkACSi8k164gsqRb5JV5rm1puYwu16PkJsMsQn0pv36uVqal0b9Ck3Qqb0myncrjuv9VyAXZNfFJ6RElL_Al8dSLCKgaqpLVhr92YOh_JEJTR/s1600/bloggertrix-rss.png" /></a></p></center>
Change https://facebook.com/Nischalcreationwith your Facebook Page Name
Change https://twitter.com/nischalcreation with your Twitter Username
Change http://stumbleupon.com/username with your Stumbleupon Username
  • Save The Gadget
  • Save The Template
  • Check Your Blog

All Done. If you have any problems regarding this, Comment and I Shall be Helping You. Happy Blogging!!!

Friday, December 12, 2014

Add Social Content Locker In Blogger

;
Hi guys, today I am bringing you the most fantastic Widget which helps to increase our Blogs traffic
By Sharing. It Is Called Social Content Locker which helps to share our blog to unlock the content. You may have seen related to this content locker in different surveying sites where we must share the page to view hidden text, downloads and much more.
So, lets add this special widget in our blog.

  • Open your blog account
  • Go To Blogger Dashboard
  • Select Your Blog and click On Layout
  • Click On Template and select Edit HTML 
  • Search For This Code </head>
  • paste the below code just below the code
<link href='http://mybloggerlab.com/StyleSheet/locker.css' rel='stylesheet' type='text/css'/>

  • Now, save your template
Now, Follow My another steps

  • Click On The Blog post where you want to add this
  • Click On Edit post
  • Select HTML in place Of Compose button
  • paste The Code There

<article id="default-usage">
<div class="to-lock" style="display: none;">
       
<!--Hidden Content Starts (You can Use HTML BELOW)-->

<div style="text-align: center; margin-bottom: 20px;">
<img src="Add_Hidden_Image_Here" alt="" style="margin: auto;" />
</div>

<div style="text-align: justify">
Add Your Hidden Text Here
</div>

<!--Hidden Content Ends (You can Use HTML ABOVE)-->

</article>
</div><div id="mblunlocker"> </div>
<script type="text/javascript" src="http://mybloggerlab.com/Scripts/lock.js"></script>
 
<script>
jQuery(document).ready(function ($) {
$("#default-usage .to-lock").socialLock({

text: {
header: "Share it To Unlock This Content",
message: "Yes, this is Social Locker. Just try it, click on one of buttons."
},

style: "ui-social-locker-secrets",
buttons: {
order: ["twitter", "facebook", "google"]
},

// twitter options
twitter: {
url: "http://www.twitter.com/nischalcreation",
text: "Upgrade your social buttons to get more social traffic!"
},

// facebook options
facebook: {
url: "http://www.facebook.com/nischalcreation",
appId: "408184442589211"
},

google: {
url: "NischalKhanal123"
}
});
});;;;
       
</script>

  • Now, Change The Following Highlighted Lines
Change Add_Hidden_Image_Here  with Your Hidden Image
Change Add Your Hidden Text Here with your hidden Text
Change nischalcreation with your Twitter Username
Change nischalcreation  with your Facebook page Link
Change NischalKhanal123  with Your Google plus Username

  • publish The post
If You Have any problems, Comment and I shall Help You. Happy Blogging!!!

Friday, November 28, 2014

Add A 360° Rotating Effect On Your Blog

;
Hi Guys, It's me Again And Today, I'm Presenting you A Nice Topic That Will make your blog cool and fantastic. It is called 360° rotating effect and it will make your blog rotate upto 360° while reloading or loading. By reading, we are thinking that it may be cool but we all have a choice. At first Look The Live Demo Of the cool widget that we are going to add it in our blog:
After Watching DEMO if you want to add this, follow my steps otherwise ignore this. Let's add it in our blog.
Follow My Steps To Add It In Blog:
  • Go To Blogger Dashboard
  • Click On Layout
  • Click On Add A Gadget
  • Select HTML/JAVASCRIPT
  • Now, add the code inside the box
<!-- bloggercruzer.blogspot.com !-->
// Bloggercruzer.blogspot.com 
<style> @-BoB-keyframes roll { 100% { -BoB-transform: rotate(360deg); } } @-o-keyframes roll { 100% { -o-transform: rotate(360deg); } } @-webkit-keyframes roll { 100% { -webkit-transform: rotate(360deg); } } body{ -BoB-animation-name: roll; -BoB-animation-duration: 4s; -BoB-animation-iteration-count: 1; -o-animation-name: roll; -o-animation-duration: 4s; -o-animation-iteration-count: 1; -webkit-animation-name: roll; -webkit-animation-duration: 4s; -webkit-animation-iteration-count: 1; } </style>

  • After Pasting The Code, Save It
  • Save The Layout
  • Open Your Blog
Now, while opening your blog, you will notice a rotating effect in your blog. If you have any problems regarding this, comment and I shall be helping You.
Happy Blogging!!!

Thursday, November 27, 2014

Add CSS Codes in Your Blogger Blog Easily

;
In my previous post, I had mentioned about CSS in Detail. So, i'm not gonna describe it anymore. In this post, we will be discussing on adding CSS codes In your blogger blog. Mainly, there are two steps of adding CSS codes in your blog. One is easy method and another is hard method. I will teach you both methods to add CSS codes. So, Follow my steps;
Easy Method:

  • Go To Blogger Dashboard
  • Click On Template
  • Click On Customize
  • Then Click On Advanced And Add CSS as shown in the picture below;

  •  Place the CSS codes in the Text area.
  • Save by click on Apply to Blog
  • Enjoy
Hard Method:
  • Go To Blogger Dashboard
  • Click On Template
  • Click On Edit HTML
  • Then Search For ]]></b:skin>
  • Paste The CSS Codes Just Above ]]></b:skin>
  • Save The Template
Note: If this method isn't properly used, it can make your template crash. So, be careful while doing it.
These Are The Steps for Adding CSS Codes in your blog. I Recommend you to use easy method to add CSS because, it won't harm your template in any ways. If you have any problems regarding this, comment and I shall help You.
Happy Blogging!!!

Know About CSS

;
You might have seen different posts related to CSS in different Blogs and Search Engines. But, what it really is? We might get confused knowing the real meaning of CSS. But at first Let's Know how Wikipedia Defines the term CSS.
According To Wikipedia:


  1. Cascading Style Sheets (CSS) is a style sheet language used for describing the look and formatting of a document written in a markup language.
CSS Stands for Cascading Style Sheet. Basically, it is a language that helps to design and manage the templates and presentations of the website. CSS is a plain text file format used for formatting content on web pages. With the help of CSS, we can enable different functions that the default websites can't do. We can add diffferent gadgets in our websites, edit fonts and appearance of our website and much more.
If you want to know how to add CSS codes in blogger, read my next post. Till then, bye!!

Remove Subscribe To Posts (Atom) From Your Blog

;
While looking our blog in a detailed way, we will find a text below every Page; Subscribe to Posts: (Atom). This text was first used for  subscribing like RSS. But, after the advancement of RSS, there is no use of it. This text now only hampers the beauty of our blog. So, in this post, we will be discussing on how to remove it.
Let's Begin. Now, Follow My Steps:

  • As usual, Go To Your Blogger Dashboard
  • Click On Template
  • Then Click On Edit HTML
  • There Search this Code:
<b:include name='feedLinks'/>

  • After You find this code, delete it
  • Save Your Template
Now, your blog shouldn't show this text as in the picture;
If you have any problems, comment and I shall be helping you.
Happy Blogging!!! 

Wednesday, November 26, 2014

Remove Posts With Label in Blogger

;
Blogger is not only a website of this world, it is a world itself. It helps to connect unknown peoples
of different parts of the world. So, the blogger users are increasing rapidly. Many of the users are beginners and don't know much about blogging. The big problem that most of the blogger users are facing is that when they clicked on a post of label, it shows "Showing Posts With Label ....". You can also see the picture below;
So, in this post, we will be discussing on removing this ugly sentence from our blog. Now, follow my steps to remove it:

  • Go To Blogger Dashboard
  • Click on Template and Then Edit HTML
  • Click Anywhere inside template and search for the following code using CTRL+F 
<b:includable id="status-message"></b:includable>

  • You Can Find That Code. Then After That Click On Arrow On The Right Side Of The Code As Shown In the picture below;


  • After that you can Find The Following codes inside it;

      <b:includable id='status-message'>
      <b:if cond='data:navMessage'>
      <div class='status-msg-wrap'>
        <div class='status-msg-body'>
          <data:navMessage/>
        </div>
        <div class='status-msg-border'>
          <div class='status-msg-bg'>
            <div class='status-msg-hidden'><data:navMessage/></div>
          </div>
        </div>
      </div>
      <div style='clear: both;'/>
      </b:if>
    </b:includable>

  • Remove All The Codes
  • Now, add the new codes there
Code:

 <b:includable id='status-message'>
<b:if cond='data:navMessage'>
<div>
</div>
<div style='clear: both;'/>
</b:if>
</b:includable>

  • Now, Save The Template
After clicking on any labels, you can't find the ugly box. If you have any problems regarding it, comment.
Happy Blogging!!

Thursday, November 13, 2014

Install A Cool Header In Blogger

;
In this huge world, Blogger users are increasing. Blogger has also became a vast world and we can't imagine how much big the blogger is. There are many causes that has made blogger more advanced and powerful One of them is Header for Blogger.
 As mentioned earlier in my previous post, I had described more about blogger header and it's benifits. When some visitors lands on our blog, their eyes first picks header. So, we must be careful to make blogger header more attractive. Follow these few and easy steps to install an attractive header in blog.

  • Create a header: You must create header before uploading it. There are different online sites where you can create more advanced blogger header but I recommend to you in using these sites:
  1. Cool Text
  2. Flaming Text

  • Uploading A Header

  • Sign To Your Blogger account 
  • Go To Dashboard menu and select Layout
  • Click On Edit Button Of Your Blog's Title Option in Layout 
  • Browse for Blogger Header and Upload It
  • Tick On Instead Of Totle And Description
  • At Last, Click Save Button
  • Enjoy!!!
That's It. By Some Reasons, if you are having some problems, feel free to ask Me via Contact Form.
Happy Blogging!!!

Be Familiar With Different Parts Of Blog

;
Blogger Users are increasing day by day. Since, it is a free web hosting site, many peoples including us are using it frequently. Many of the bloggers are beginners. They don't have specific knowledge about blogging. So, they go on searching in Different Search Engines Like Google And Yahoo and search " How to Be A Professional Blogger in Just Steps" and bla bla... .
 But, we can't easily be a Professional Blogger. To be a professional blogger or to Change from beginner to advanced Blogger, we must know the interior parts of the blogger. Blogger provides us different features.
They are mainly composed of Five Parts. They Are:

  1. Header
Header is the topmost part of the blog. When some visitors lands our blog, their eyes first picks header. So, we must be careful to make it more attractive. In my upcoming posts, i will write the ways to make our blogger header more attractive.

     2. Navigation Bar (Nav-Bar)


Navigation bar is the part just below the blogger Header. It contains various tabs. Especially animated categories and pages are kept inside Nav-Bar to help user to jump from one post to another easily. As Mentioned earlier in header, I will write a post on customizing and making the blogger Nav-Bar Attractive in my upcoming posts.

    3. Post Area 
Post Area Is the main part of blogger. It is the area where we can show our posted tutorials. To be an advanced blogger, we must customize the post areas. I will teach you to make our post areas attractive in my upcoming posts.

     4. Sidebar

Sidebar is also an important part of our blog where we can put many widgets and gadgets. We can put there Popular Posts, About The Author, Follow Me, Categories And Much More. The most interesting thing is that blogger provides us the function to encode our own codes. I will teach you to make sidebars look cool in my upcoming posts. So, stay tuned.

   5. Footer
Footer is the last part of blog where user can write about themselves, give credits to others and much more. We can put our widgets also there. I will teach you to make footer look attractive although many users don''t see it.

Blogger Cruzer

Blogger Cruzer

Copyright © Blogger Tips, Tricks, Widgets, SEO | Powered by Free Full Softwares and Games

Design by Nischal Khanal Blogger Cruzer

Auto Scroll Stop Scroll