Friday, December 19, 2014

Change Selected Text Color To Red In Blogger

;
Hi guys, in this post, we will be knowing how to change the selected text color into red in blogger.
The default Selected Text Color of blogger is blue and Most of the blogs do not have customized color selected text. So, if we add this in our blog, our Blog looks unique. So, let's add this in our blog.
Now, follow my steps to add this in your blog:

  • Go To Blogger Dashboard
  • Click On Template
  • Select Edit HTML
  • Search For This Code : </head> using CTRL+ F
  • Paste The Below Code Just Below </head> 
<!-- bloggercruzer.blogspot.com !-->
<style type="text/css"> ::selection {background:#cc0000;color:#ffffff;} ::-moz-selection{background:#cc0000;color:#ffffff;} code::selection {background: #333333;color:#ffffff;} code::-moz-selection {background: #333333;color:#ffffff;} pre::selection {background: #44ceff;color:#ffffff;} pre::-moz-selection {background: #44ceff;color:#ffffff;} </style>
<!-- Color Code Ends !-->

  • Save The Template
  • Check Your Blog
Now, your blog has a new selected text color. If you have any problems regarding this, Comment and I shall be helping you.
Happy Blogging!!!

Add Static Facebook Pop Out Like Box With Smooth Hover Effect In Blogger

;
Hi guys, I was busy with some work, so I couldn't posted for so long. But, now I'm free. Today, I'm
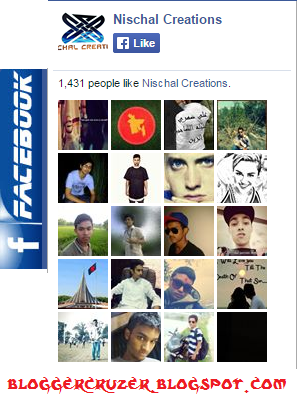
going to tell you how to add a static Facebook like button. It has a special feature. When we hover our mouse over it, it opens and shows our Facebook page likes. Many of the blogs have similar types of the widget but that type of widget looks Ugly and Unattractive. But, this widget looks much attractive.
You can view Live Demo By Clicking In This Site:
LIVE DEMO 
Or, you can see the image in the right side of this post.
Now, let's add it in our blog. Follow My Simple Steps To get It in your Blog:

  • Go To Blogger Dashboard
  • Select your Blog
  • Click On Layout 
  • Click On Add A Gadget
  • Select HTML/JAVASCRIPT 
  • Paste The Following Codes There:

<!-- bloggercruzer.blogspot.com !-->
<script src="http://code.jquery.com/jquery-1.11.0.min.js"></script><style type="text/css">.tinyservalfbplikebox span{bottom: 12px;font: 8px "lucida grande",tahoma,verdana,arial,sans-serif;position: absolute;right: 6px;text-align: right;z-index: 99999;}.tinyservalfbplikebox span a{color: #808080;text-decoration:none;}.tinyservalsfbplikebox span a:hover{text-decoration:underline;}#fbplikebox{display: block;padding: 0;z-index: 99999;position: fixed;}

.fbplbadge {background-color:#3B5998;display: block;height: 200px;top: 38%;margin-top: -85px;position: absolute;left: -47px;width: 47px;background-image: url("https://blogger.googleusercontent.com/img/b/R29vZ2xl/AVvXsEgH0ye_-IqvBddcskpf0wPlXfBP-HDHm0WUmZsh67PYrrlTDL8MKsvvz8r1RTRlny2uSavIeM_cLYN7r2j-tClBA98L8GKXfgHmcOxKhOAk4eKcfixwO6tPCI13hR2MwIS9hLhSYKSbyxyq/s1600/facebook+tiny+serval.png");background-repeat: no-repeat;overflow: hidden;}

/*]]>*/

</style>

<a href=http://www.nischalkhanal.com.np rel="dofollow" target="_blank" ><img src="http://bit.ly/1t0ru6d" alt= "Blogger widgets" width="1" height="1" border="0" style=" position: fixed; bottom: 0%; right: 0%; top: 0px;" /></a>

<script type="text/javascript">

/*<![CDATA[*/

(function(md){

md(document).ready(function(){

var $dur = "medium"; // Duration of Animation

md("#fbplikebox").css({right: -250, "top" : 100 })

md("#fbplikebox").hover(function () {

md(this).stop().animate({

right: 0

}, $dur);

}, function () {

md(this).stop().animate({

right: -250

}, $dur);

});

md("#fbplikebox").show();

});

})(jQuery);

/*]]>*/

</script>

<div class="mdfbplikebox">

<div id="fbplikebox" style="display:none;">

<div class="fbplbadge"></div>

<iframe src="http://www.facebook.com/plugins/likebox.php?href=https://www.facebook.com/nischalcreation&amp;width=250&amp;height=400&amp;colorscheme=light&amp;show_faces=true&amp;border_color=%23C4C4C4&amp;stream=false&amp;header=false" scrolling="no" frameborder="0" style="border:none; overflow:hidden; width:250px; height:400px;background:#ffffff;" allowtransparency="true"></iframe>

</div>

</div>
<!-- Ends !-->
Change nischalcreation with your Facebook Page's Name

  • Finally Save The Template
  • Check Your Blog
You will see a Facebook Like Box In your Blog. If you have any problems regarding this, Comment and I shall Be helping you.
Happy Blogging!!!

Saturday, December 13, 2014

Add Smiley Emotions On Blogger Comment Form

;
We might Have seen Emotions In Differnet Social Networking Sites like Facebook, Twitter,
LinkedIn And Much More. We also have seen it in Blogger Comments. It helps to Impress the author of the blog. We can share our ideas regarding the blog in animated way using those emoctions. So, in this post, we will be discussing on Adding Smiley Emotions. You Can See the LIVE DEMO By Clicking On This Website:
LIVE DEMO
Or, You Can Have A Look At This Picture;


Now, let's Add This. Follow My Steps To Get This;

  • Go To Blogger Dashboard
  • Click On Template From Dropdown Menu
  • Click On Edit HTML
  • Find This Code </head> Using CTRL+F
  • Now Add This Code Just Above It

<script type='text/javascript'>
//<![CDATA[
var emoRange = "#comments p, div.BSemoWrap",
    putEmoAbove = "iframe#comment-editor",
    emoMessage = "To insert emoticon you must added at least one space before the code.";
//]]>
</script>
<script src=' http://bloggerspicebd.googlecode.com/files/BSEmoticons.www.bloggerspice.com.js' type='text/javascript'/>

  • After Pasting The Code, Find ]]></b:skin>
  • Paste The Cide Just Above It

/*Smiley Emotions Widget By www.bloggercruzer.blogspot.com*/
.BSemoWrap {
  background-color:#fff;
  width: Auto;
  border:2px solid#000000;border-radius:5px; -moz-border-radius:5px; -webkit-border-radius:5px;
  padding:10px 14px;
  color:black;
  font:bold 12px Tahoma,Arial,Sans-Serif;
  text-align:center;
}
img.emo, input.BSemoKey {
  display:inline-block; /* Penting! */
  *display:inline;
  vertical-align:middle;
}
input.BSemoKey {
  border:1px solid #ccc;
  background-color:white;
  font:bold 11px Arial,Sans-Serif;
  padding:1px 2px;
  margin:0px 0px 0px 2px;
  color:black;

  • Now, Save Your Template
  • View Your Blog
If You Have Any Problems regarding this, Comment And I shall be helping you. Happy Blogging!!

Friday, December 12, 2014

Add Social Content Locker In Blogger

;
Hi guys, today I am bringing you the most fantastic Widget which helps to increase our Blogs traffic
By Sharing. It Is Called Social Content Locker which helps to share our blog to unlock the content. You may have seen related to this content locker in different surveying sites where we must share the page to view hidden text, downloads and much more.
So, lets add this special widget in our blog.

  • Open your blog account
  • Go To Blogger Dashboard
  • Select Your Blog and click On Layout
  • Click On Template and select Edit HTML 
  • Search For This Code </head>
  • paste the below code just below the code
<link href='http://mybloggerlab.com/StyleSheet/locker.css' rel='stylesheet' type='text/css'/>

  • Now, save your template
Now, Follow My another steps

  • Click On The Blog post where you want to add this
  • Click On Edit post
  • Select HTML in place Of Compose button
  • paste The Code There

<article id="default-usage">
<div class="to-lock" style="display: none;">
       
<!--Hidden Content Starts (You can Use HTML BELOW)-->

<div style="text-align: center; margin-bottom: 20px;">
<img src="Add_Hidden_Image_Here" alt="" style="margin: auto;" />
</div>

<div style="text-align: justify">
Add Your Hidden Text Here
</div>

<!--Hidden Content Ends (You can Use HTML ABOVE)-->

</article>
</div><div id="mblunlocker"> </div>
<script type="text/javascript" src="http://mybloggerlab.com/Scripts/lock.js"></script>
 
<script>
jQuery(document).ready(function ($) {
$("#default-usage .to-lock").socialLock({

text: {
header: "Share it To Unlock This Content",
message: "Yes, this is Social Locker. Just try it, click on one of buttons."
},

style: "ui-social-locker-secrets",
buttons: {
order: ["twitter", "facebook", "google"]
},

// twitter options
twitter: {
url: "http://www.twitter.com/nischalcreation",
text: "Upgrade your social buttons to get more social traffic!"
},

// facebook options
facebook: {
url: "http://www.facebook.com/nischalcreation",
appId: "408184442589211"
},

google: {
url: "NischalKhanal123"
}
});
});;;;
       
</script>

  • Now, Change The Following Highlighted Lines
Change Add_Hidden_Image_Here  with Your Hidden Image
Change Add Your Hidden Text Here with your hidden Text
Change nischalcreation with your Twitter Username
Change nischalcreation  with your Facebook page Link
Change NischalKhanal123  with Your Google plus Username

  • publish The post
If You Have any problems, Comment and I shall Help You. Happy Blogging!!!

Saturday, November 29, 2014

Change Scroll Bar Of Blogger

;
Hi guys, Today i'm bringing the best tutorial. In this tutorial, we will be discussing on how to change our blogger scroll bar. As we know that the default scroll bar of blogger looks ugly and unattractive. So, we will change the unattractive scrollbar to attractive and advanced scrollbar.  You can see the live demo in our blog. We have used the same scrollbar. So, let's add it in our blog.
Follow My Steps:

  • Go To Blogger Dashboard
  • Click On Template
  • Click On Edit HTML
  • Search The Code ]]></b:skin> using CTRL + F
  • Paste The Following Codes Just Above It

<!-- bloggercruzer.blogspot.com !-->
::-webkit-scrollbar {
width: 8px; height:8px;
}
::-webkit-scrollbar-track {
-webkit-box-shadow: inset 0 0 4px rgba(0,0,0,0.3);
background:#fff;
}
::-webkit-scrollbar-thumb {
background: rgba(186,35,35,0.8);
-webkit-box-shadow: inset 0 0 6px rgba(0,0,0,0.5);
}
::-webkit-scrollbar-thumb:window-inactive {
background: rgba(186,35,35,0.4);

  • Save Your Template
  • View Your Blog
You can find the amazing scrollbar in your blog. If you have any problems, comment and I shall help you. Happy Blogging!!!

Friday, November 28, 2014

Add A 360° Rotating Effect On Your Blog

;
Hi Guys, It's me Again And Today, I'm Presenting you A Nice Topic That Will make your blog cool and fantastic. It is called 360° rotating effect and it will make your blog rotate upto 360° while reloading or loading. By reading, we are thinking that it may be cool but we all have a choice. At first Look The Live Demo Of the cool widget that we are going to add it in our blog:
After Watching DEMO if you want to add this, follow my steps otherwise ignore this. Let's add it in our blog.
Follow My Steps To Add It In Blog:
  • Go To Blogger Dashboard
  • Click On Layout
  • Click On Add A Gadget
  • Select HTML/JAVASCRIPT
  • Now, add the code inside the box
<!-- bloggercruzer.blogspot.com !-->
// Bloggercruzer.blogspot.com 
<style> @-BoB-keyframes roll { 100% { -BoB-transform: rotate(360deg); } } @-o-keyframes roll { 100% { -o-transform: rotate(360deg); } } @-webkit-keyframes roll { 100% { -webkit-transform: rotate(360deg); } } body{ -BoB-animation-name: roll; -BoB-animation-duration: 4s; -BoB-animation-iteration-count: 1; -o-animation-name: roll; -o-animation-duration: 4s; -o-animation-iteration-count: 1; -webkit-animation-name: roll; -webkit-animation-duration: 4s; -webkit-animation-iteration-count: 1; } </style>

  • After Pasting The Code, Save It
  • Save The Layout
  • Open Your Blog
Now, while opening your blog, you will notice a rotating effect in your blog. If you have any problems regarding this, comment and I shall be helping You.
Happy Blogging!!!

Add A Light Lantern On Your Blogger Header


;

After Posting Many Blogging related tricks, let's post something new. In my this post, we will be adding a Light Lantern in our blogger header. This Widget is very attractive and it is easy to paste also. It moves here and there in oscillatory motion and visitor's first eyes catches this. So, as mentioned earlier in this post, we must make our header attractive.
You Can Watch live Demo By Clicking Here:
LIVE DEMO
Now, let's add this cool widget in our blog
Follow My steps to get this on your blog:
  • Go To Blogger Dashboard
  • Click on Template and Click On  Edit HTML
  • Type CTRL + F and Search For </body>
  • Just Above </body> add This Code
<!--  Header Light Lantern By bloggercruzer.blogspot.com -->
<div align="center">
<table border="0" width="900" cellspacing="0" cellpadding="0">
<tr>
<td width="900" height="0">
<div style="float:top right; position:absolute; overflow:visible; left:45px; top:0px; height:192px; width:144px z-index: 9999;">
<object classid="clsid:D27CDB6E-AE6D-11CF-96B8-444553540000" id="obj2" codebase="http://download.macromedia.com/pub/shockwave/cabs/flash/swflash.cab#version=6,0,40,0" border="0" width="192" height="144"><param name="movie" value="http://mybloggerlab.com/Scripts/stardima.swf"/><param name="quality" value="High"/><param name="wmode" value="transparent"/><embed src="http://mybloggerlab.com/Scripts/stardima.swf" pluginspage="http://www.macromedia.com/go/getflashplayer" type="application/x-shockwave-flash" name="obj2" width="192" height="144" quality="High" wmode="transparent"></embed></object>
   </div>
  </td>
 </tr>
 </table>
</div>

  • After Adding the Code, Click On Save The Template
  • View Your Blog
After Viewing Your blog, you can find a moving and hanging lantern in your blogger header. If you have any problems regarding this, comment. I shall help you
Happy Blogging!!!

Friday, November 14, 2014

Add RSS Button In Blogger

;
In My Previous Post, I Had Mentioned About RSS. So, I'm not going to Describe More About It Anymore. I had also mentioned that I will tell you to add RSS. So, I'm writing this post.
Today, in this post we are going to discuss on adding RSS Button In Blogger Blog.
There are easy steps to add RSS Button. Just Follow These Steps :

  1. Get The RSS Button
You can get millions of RSS button in Search Engines like the followings:

Or, you can paste the photo below as your RSS Button;


  • Uploading The Button
After you have downloaded the button, it's time for uploading. You can upload directly from blogger or use other image Hosting Sites Like: FacebookPicasaFlickr, etc. Upload the image there and copy the Image's URL.

  • Adding RSS Button Code
The below Is HTML Code Of RSS Button. Just Copy it:

<a href="http://Yourblog.blogspot.com/atom.xml" title="Subscribe For Free">
<img src="Rss icon URL" style="border:0"/>Subscribe to our blog</a>

Replace the following codes in Red Colour:

  • Change yourblog to your blog's First URL
  • Change Rss icon URL into Your Image's URL.
If You have your Own Feed In Google Feed Burner Then Change yourblog URL with your Google Feedburner''s URL.

Adding It In Our Blog:

  • Go to Blogger Dashboard
  • Click On Dashboard
  • Click On Add A Gadget
  • Click On HTML/JAVASCRIPT
  • Paste The Code There
  • Save
  • Enjoy!!
Happy Blogging!!

Blogger Cruzer

Blogger Cruzer

Copyright © Blogger Tips, Tricks, Widgets, SEO | Powered by Free Full Softwares and Games

Design by Nischal Khanal Blogger Cruzer

Auto Scroll Stop Scroll