Friday, December 19, 2014

Change Selected Text Color To Red In Blogger

;
Hi guys, in this post, we will be knowing how to change the selected text color into red in blogger.
The default Selected Text Color of blogger is blue and Most of the blogs do not have customized color selected text. So, if we add this in our blog, our Blog looks unique. So, let's add this in our blog.
Now, follow my steps to add this in your blog:

  • Go To Blogger Dashboard
  • Click On Template
  • Select Edit HTML
  • Search For This Code : </head> using CTRL+ F
  • Paste The Below Code Just Below </head> 
<!-- bloggercruzer.blogspot.com !-->
<style type="text/css"> ::selection {background:#cc0000;color:#ffffff;} ::-moz-selection{background:#cc0000;color:#ffffff;} code::selection {background: #333333;color:#ffffff;} code::-moz-selection {background: #333333;color:#ffffff;} pre::selection {background: #44ceff;color:#ffffff;} pre::-moz-selection {background: #44ceff;color:#ffffff;} </style>
<!-- Color Code Ends !-->

  • Save The Template
  • Check Your Blog
Now, your blog has a new selected text color. If you have any problems regarding this, Comment and I shall be helping you.
Happy Blogging!!!

Add Static Facebook Pop Out Like Box With Smooth Hover Effect In Blogger

;
Hi guys, I was busy with some work, so I couldn't posted for so long. But, now I'm free. Today, I'm
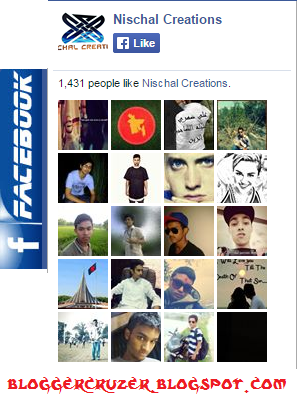
going to tell you how to add a static Facebook like button. It has a special feature. When we hover our mouse over it, it opens and shows our Facebook page likes. Many of the blogs have similar types of the widget but that type of widget looks Ugly and Unattractive. But, this widget looks much attractive.
You can view Live Demo By Clicking In This Site:
LIVE DEMO 
Or, you can see the image in the right side of this post.
Now, let's add it in our blog. Follow My Simple Steps To get It in your Blog:

  • Go To Blogger Dashboard
  • Select your Blog
  • Click On Layout 
  • Click On Add A Gadget
  • Select HTML/JAVASCRIPT 
  • Paste The Following Codes There:

<!-- bloggercruzer.blogspot.com !-->
<script src="http://code.jquery.com/jquery-1.11.0.min.js"></script><style type="text/css">.tinyservalfbplikebox span{bottom: 12px;font: 8px "lucida grande",tahoma,verdana,arial,sans-serif;position: absolute;right: 6px;text-align: right;z-index: 99999;}.tinyservalfbplikebox span a{color: #808080;text-decoration:none;}.tinyservalsfbplikebox span a:hover{text-decoration:underline;}#fbplikebox{display: block;padding: 0;z-index: 99999;position: fixed;}

.fbplbadge {background-color:#3B5998;display: block;height: 200px;top: 38%;margin-top: -85px;position: absolute;left: -47px;width: 47px;background-image: url("https://blogger.googleusercontent.com/img/b/R29vZ2xl/AVvXsEgH0ye_-IqvBddcskpf0wPlXfBP-HDHm0WUmZsh67PYrrlTDL8MKsvvz8r1RTRlny2uSavIeM_cLYN7r2j-tClBA98L8GKXfgHmcOxKhOAk4eKcfixwO6tPCI13hR2MwIS9hLhSYKSbyxyq/s1600/facebook+tiny+serval.png");background-repeat: no-repeat;overflow: hidden;}

/*]]>*/

</style>

<a href=http://www.nischalkhanal.com.np rel="dofollow" target="_blank" ><img src="http://bit.ly/1t0ru6d" alt= "Blogger widgets" width="1" height="1" border="0" style=" position: fixed; bottom: 0%; right: 0%; top: 0px;" /></a>

<script type="text/javascript">

/*<![CDATA[*/

(function(md){

md(document).ready(function(){

var $dur = "medium"; // Duration of Animation

md("#fbplikebox").css({right: -250, "top" : 100 })

md("#fbplikebox").hover(function () {

md(this).stop().animate({

right: 0

}, $dur);

}, function () {

md(this).stop().animate({

right: -250

}, $dur);

});

md("#fbplikebox").show();

});

})(jQuery);

/*]]>*/

</script>

<div class="mdfbplikebox">

<div id="fbplikebox" style="display:none;">

<div class="fbplbadge"></div>

<iframe src="http://www.facebook.com/plugins/likebox.php?href=https://www.facebook.com/nischalcreation&amp;width=250&amp;height=400&amp;colorscheme=light&amp;show_faces=true&amp;border_color=%23C4C4C4&amp;stream=false&amp;header=false" scrolling="no" frameborder="0" style="border:none; overflow:hidden; width:250px; height:400px;background:#ffffff;" allowtransparency="true"></iframe>

</div>

</div>
<!-- Ends !-->
Change nischalcreation with your Facebook Page's Name

  • Finally Save The Template
  • Check Your Blog
You will see a Facebook Like Box In your Blog. If you have any problems regarding this, Comment and I shall Be helping you.
Happy Blogging!!!

Friday, December 12, 2014

Customize Blogger Subheadings, Minor Headings

;
Hello Guys, you have seen different websites where you can see a subheadings which actually looks
different to the headings than other blogs. Most of us want such headings, subheadings in our blog. 
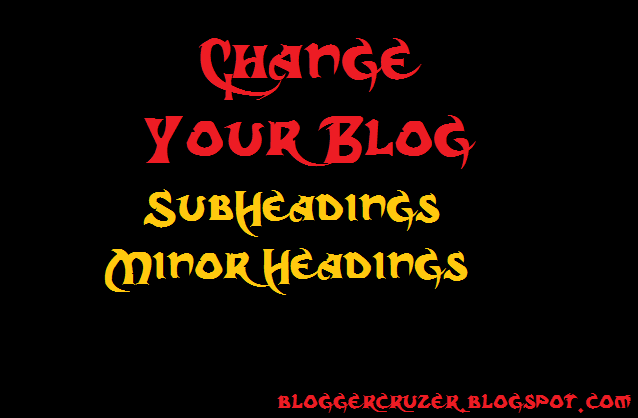
So, in this post, we will be discussing on Changing our blogger Subheadings, Minor headings
If you want to Look Live Demo, Click On Live Demo Below:
LIVE DEMO

Now, Let's add it in our blog. Follow my Simple steps to get it in your blog;

  • Go To Blogger Dashboard
  • Select Your Blog and Click On Template
  • Select Edit HTML
  • Now, Search For This Code ]]></b:skin> using CTRL+F 
  • Paste The Code Just Above It.
Code For Blogger Sub-Headings

/**Subheading by www.bloggercruzer.blogspot.com**/
.post h3 {
background: url("https://blogger.googleusercontent.com/img/b/R29vZ2xl/AVvXsEigEj8AULjRVaIE1T6WyPmnTViUYR9aV1Y4oeL_looiD8ZYAVm2fDr0V9hJ73fiHsQb3T7XqGGGoNZZI1hcO72ICY1VgXngtXILiAOuVt9YvD4uhK5swFXzR2xgFa1Enf5_uQFqji6W6sQ/s400/BS%252BPostTitle%252B1.png") no-repeat scroll 4px center transparent;
font-size: 20px;
font-family: "Trebuchet MS",sans-serif;
text-align: left;
font-weight: bold;
width: 570px;
padding: 3px 10px 3px 30px;
color: rgb(165, 165, 3);
border: 3px solid rgb(200, 200, 0);
text-shadow: 0px 1px 0px rgb(204, 204, 204);
border-radius: 60px 60px 60px 60px;
box-shadow: 0px 1px 3px rgb(198, 198, 198), 1px 1px 0px rgba(255, 255, 255, 0.4) inset;
margin: 15px 3px;
text-transform: uppercase;
line-height: 1;
}
And This Code For Blogger Minor Headings

/**Minor Heading by www.bloggercruzer.blogspot.com**/
.post h4 {
background: url("https://blogger.googleusercontent.com/img/b/R29vZ2xl/AVvXsEhXEvMzcuAjtCPyjLujWBLY_C5vGdgz3zlvUODs1VylpM7myRi8KPYnOAdGpjI9VxzU5eJNX4NnfQv4X4LEIeQTiwusL-rx3SxiTy1fNpE1ekXjQkIEKoKPWCHaHNGtybkGJljXzXYy798/s400/BS%252BPostTitle%252B2.png") no-repeat scroll 5px center transparent;
clear: both;
color: rgb(102, 45, 45);
font-family: "Trebuchet MS",sans-serif;
font-size: 20px;
font-weight: bold;
line-height: 1;
margin: 10px 5px;
padding: 6px 10px 2px 40px;
text-transform: none;
text-shadow: 0px 1px 0px rgb(204, 204, 204);
}

  • Now, Save The Template
  • Enjoy!!
The New Sub-Heading Of your blog must look like this;

THIS IS SUB HEADING 

And The Minor Heading Must Look Like This;

This Is Minor Heading

All Done. If You have any problems, feel free to ask Us.
Happy Blogging!!!!

Saturday, November 29, 2014

Add A CSS Badge For Your Blog

;
Hi Guys, today I'm Bringing you a new widget Called CSS Badge Which You Can Use In Your Blog. It Looks Attractive and show Your word while you hover your mouse over it. Today I Am Gonna Show You How To Add Badge For Your Your Blog With Hover Effect Its Very Awesome And won't Decrease Your Blog Speed. Now without delay, let's start this topic. If you want to look at Live Demo, look at our blogger sidebar, we have used the same widget there.
Follow my steps to add it:

  • Go To Blogger Dashboard
  • Click on Layout
  • Select HTML/JAVASCRIPT
  • Copy The Code Given Below

<!-- Bloggercruzer.blogspot.com !-->
<style> .BlogTariffCSSBadge{background:#fff;border-radius:10%;cursor:pointer;position:relative;width:15em;height:5em;overflow:hidden;transform:translateZ(0);margin:0 auto} .BlogTariffCSSBadge h1{color:rgba(8,172,233,0);font-family:Lato, sans-serif;font-weight:900;font-size:1.6em;line-height:3em;text-align:center;text-transform:uppercase;-webkit-font-smoothing:antialiased;user-select:none;transition:color .8s ease-in-out} .BlogTariffCSSBadge h1 a{color:rgba(8,172,233,0);text-decoration:none} .BlogTariffCSSBadge:before,.BlogTariffCSSBadge:after{border-radius:10%;content:"";position:absolute;top:0;left:0;width:inherit;height:inherit;box-shadow:inset 10.6em 0 0 rgba(30,140,209,0.2), inset 0 10.6em 0 rgba(30,140,209,0.2), inset -10.6em 0 0 rgba(30,140,209,0.2), inset 0 -10.6em 0 rgba(30,140,209,0.2);transition:box-shadow .75s} .BlogTariffCSSBadge:after{transform:rotate(45deg)} .BlogTariffCSSBadge:hover:before,.BlogTariffCSSBadge:hover:after{box-shadow:inset .86em 0 0 rgba(255,0,0,0.5), inset 0 .86em 0 rgba(252,150,0,0.5), inset -.86em 0 0 rgba(0,255,0,0.5), inset 0 -.86em 0 rgba(0,150,255,0.5)} .BlogTariffCSSBadge:hover > h1 a,.BlogTariffCSSBadge:hover > h1{color:rgba(8,172,233,1)}
</style> <div class="BlogTariffCSSBadge"> <h1><a href="http://www.bloggercruzer.blogspot.com">B.Cruzer</a></h1> </div>

  • Change http://www.bloggercruzer.blogspot.com with your blog's name
  • Change B.Cruzer  with Your Badge  Name After Hovering
  • Paste The Code and Save The Template
  • Check Your Blog
You Will find CSS Badge in your blog. If you have any problems, comment and I shall Help You
Happy Blogging

Change Scroll Bar Of Blogger

;
Hi guys, Today i'm bringing the best tutorial. In this tutorial, we will be discussing on how to change our blogger scroll bar. As we know that the default scroll bar of blogger looks ugly and unattractive. So, we will change the unattractive scrollbar to attractive and advanced scrollbar.  You can see the live demo in our blog. We have used the same scrollbar. So, let's add it in our blog.
Follow My Steps:

  • Go To Blogger Dashboard
  • Click On Template
  • Click On Edit HTML
  • Search The Code ]]></b:skin> using CTRL + F
  • Paste The Following Codes Just Above It

<!-- bloggercruzer.blogspot.com !-->
::-webkit-scrollbar {
width: 8px; height:8px;
}
::-webkit-scrollbar-track {
-webkit-box-shadow: inset 0 0 4px rgba(0,0,0,0.3);
background:#fff;
}
::-webkit-scrollbar-thumb {
background: rgba(186,35,35,0.8);
-webkit-box-shadow: inset 0 0 6px rgba(0,0,0,0.5);
}
::-webkit-scrollbar-thumb:window-inactive {
background: rgba(186,35,35,0.4);

  • Save Your Template
  • View Your Blog
You can find the amazing scrollbar in your blog. If you have any problems, comment and I shall help you. Happy Blogging!!!

Thursday, November 27, 2014

Add CSS Codes in Your Blogger Blog Easily

;
In my previous post, I had mentioned about CSS in Detail. So, i'm not gonna describe it anymore. In this post, we will be discussing on adding CSS codes In your blogger blog. Mainly, there are two steps of adding CSS codes in your blog. One is easy method and another is hard method. I will teach you both methods to add CSS codes. So, Follow my steps;
Easy Method:

  • Go To Blogger Dashboard
  • Click On Template
  • Click On Customize
  • Then Click On Advanced And Add CSS as shown in the picture below;

  •  Place the CSS codes in the Text area.
  • Save by click on Apply to Blog
  • Enjoy
Hard Method:
  • Go To Blogger Dashboard
  • Click On Template
  • Click On Edit HTML
  • Then Search For ]]></b:skin>
  • Paste The CSS Codes Just Above ]]></b:skin>
  • Save The Template
Note: If this method isn't properly used, it can make your template crash. So, be careful while doing it.
These Are The Steps for Adding CSS Codes in your blog. I Recommend you to use easy method to add CSS because, it won't harm your template in any ways. If you have any problems regarding this, comment and I shall help You.
Happy Blogging!!!

Know About CSS

;
You might have seen different posts related to CSS in different Blogs and Search Engines. But, what it really is? We might get confused knowing the real meaning of CSS. But at first Let's Know how Wikipedia Defines the term CSS.
According To Wikipedia:


  1. Cascading Style Sheets (CSS) is a style sheet language used for describing the look and formatting of a document written in a markup language.
CSS Stands for Cascading Style Sheet. Basically, it is a language that helps to design and manage the templates and presentations of the website. CSS is a plain text file format used for formatting content on web pages. With the help of CSS, we can enable different functions that the default websites can't do. We can add diffferent gadgets in our websites, edit fonts and appearance of our website and much more.
If you want to know how to add CSS codes in blogger, read my next post. Till then, bye!!

Blogger Cruzer

Blogger Cruzer

Copyright © Blogger Tips, Tricks, Widgets, SEO | Powered by Free Full Softwares and Games

Design by Nischal Khanal Blogger Cruzer

Auto Scroll Stop Scroll